Most subwoofers are running at 60-70% of their potential right out of the box because of setup choices that were made without much thought. These aren’t hardware limitations — they’re fixable. Here’s what I do in every professional installation I complete, in order of impact.
1. Fix the Placement First
Everything else is secondary to placement. A sub in the wrong room position can cancel bass at your listening seat rather than reinforce it. Use the subwoofer crawl: put the sub at your listening position, play bass music, crawl around the room perimeter listening for where bass sounds clearest. That position is where your sub should go. Takes 5 minutes and often makes more difference than any equipment upgrade.
2. Run Room Correction
If your receiver has Audyssey, YPAO, AccuEQ, or Dirac: run it with the sub connected. These systems measure your room acoustically and apply automatic EQ corrections that compensate for room modes and level differences between channels. It’s not perfect, but it consistently produces better results than manual setup for most people.
After running it: check the subwoofer trim level in the receiver settings. Audyssey in particular sometimes sets the sub 2-4dB lower than ideal for movie use. A manual boost of +2dB often improves the home theater experience after calibration.
3. Set the Phase Correctly
Switch between 0° and 180° with bass music playing. Pick whichever sounds louder and fuller from your listening seat. This takes 30 seconds and can recover several dB of bass output that was being lost to cancellation. Most people never do this. Don’t be most people.
4. Set the Crossover Properly
Wrong crossover creates either a gap (thin bass) or a hump (boomy bass). Start at 80Hz. If your main speakers roll off higher than that — small bookshelf speakers often do — move the crossover up to match. If you have large floor-standers that handle bass well to 40Hz, you can lower the crossover to 60Hz to give them more of the range they handle well.
5. Calibrate the Gain Correctly
The gain knob is not a volume control — it’s a sensitivity calibration control. Set it once and leave it. Start at 9 o’clock (25% up from minimum). At your normal listening level, bass should blend naturally — present but not identifiable as coming from a specific location. If you can pinpoint the sub: turn the gain down. If bass seems absent: turn it up slightly. Then don’t touch the gain knob again; use the receiver’s sub trim for future adjustments.
6. Add an Isolation Pad
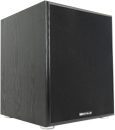
If you’re on a wooden floor, an isolation pad under the sub often improves bass clarity by reducing feedback into the floor structure. Particularly noticeable in rooms where the floor resonates at certain bass frequencies. The Auralex SubDude is available on Amazon-40 and worth it in the right situation.
7. Consider EQ
If your sub or receiver has parametric EQ, use it to tame any room mode peaks — those specific bass frequencies that boom because the room amplifies them. Room EQ Wizard (free) with a $75 measurement microphone lets you see exactly what’s happening in your room and apply targeted corrections. The result is noticeably more even, natural bass throughout the listening area.
8. Think About a Second Sub
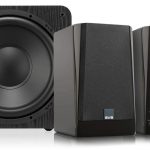
If after all the above you still have positions in the room where bass is thin while others get too much, a second sub placed asymmetrically is the solution. Two Klipsch R-120SW units at available on Amazon total will produce more even room bass than any single sub at any price.